STUDENT SPOTLIGHT
Success stories from The Editing Bootcamp graduates
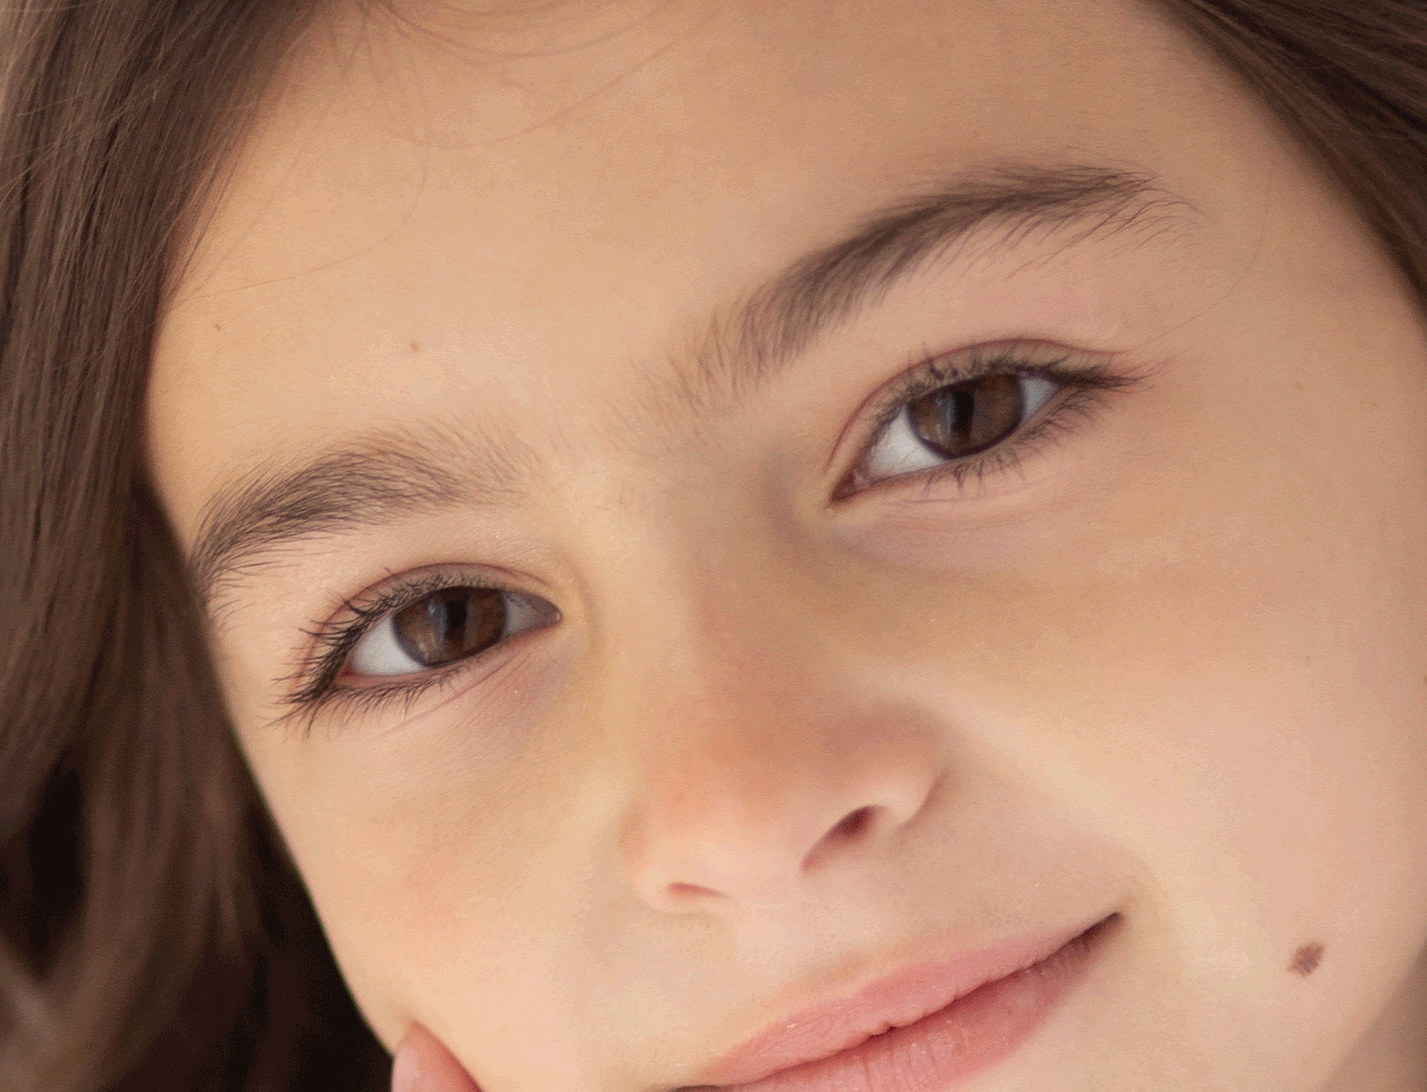
I'm a natural light photographer specializing in child photography. I thank Hashem every day for giving me sunlight, chocolate, and the best job of all: storytelling.
ACRYLIC PRINTS
ACRYLIC PRINTS


Bootcamp
The Editing


Take your images from 'meh' to magic and give your clients painterly pieces they will beg to pay for.
Up your image editing game! This 10-week, hands-on course teaches you my exact step-by-step personal workflow in easy-peasy baby pieces, so you can master your edits and confidently create consistent artwork that your audience easily recognizes as your style, even without a watermark.
Professional, pre-recorded classes let you learn on your own time, but are dripped on a specific schedule so you're always on the same page as your fellow campers. That makes for great support on our private chat and accountability pods!


before
The Editing Bootcamp is for You If...
You're a photographer with no shortage of artistic vision who is tired of comparing your RAW files to everyone else's edits and berating yourself for not measuring up. You are ready (so ready!) to take the vision you have in your head and teach your fingers how to bring that to life on-screen.
You're frustrated with trying techniques from here-there and everywhere and are looking for a solid, tried-and-true workflow that gets the job done.
You want to be confident in your ability to create consistent edits that people recognize as your style, even without a watermark.
Whether You're...
a true beginner who has never touched photoshop before...
or
an experienced editor looking to nosh some tips on how to make your edits look more like these,
You've come to the right place, and I'm going to tell you exactly how The Editing Bootcamp will give you the skills, processes, support, and inspiration you need to get edits like mine.

3 WAYS TO TEB:

By the end of this program, you will be:
Super comfortable in Photoshop, with an efficient workspace setup conducive to image editing
In love with Lightroom and your ability to cull and sync image edits super-fast in it
A master at working with layers and masks - so well, you could do it in your sleep
Effortlessly rocking head-changes and background swaps
Skilled in my favorite method of smoothing skin to believable perfection, without it looking fake and plastic-y
In on the beautiful secret of enhancing definition to create painterly edits
Skilled in using textures and overlays to enhance, not detract from your vision
Adept at crafting your own, personal sequence of your favorite styling and overlay techniques
Editing with a consistent workflow for consistent results
Confident that you can create magical edits, every time
Professional, pre-recorded classes let you learn on your own time, but are dripped on a specific schedule so you're always on the same page as your fellow campers. That makes for great support on our private chat and accountability pods!


before

learn to create edits like these
Professional, pre-recorded classes let you learn on your own time, but are dripped on a specific schedule so you're always on the same page as your fellow campers. That makes for great support on our private chat and accountability pods!


before
Professional, pre-recorded classes let you learn on your own time, but are dripped on a specific schedule so you're always on the same page as your fellow campers. That makes for great support on our private chat and accountability pods!


before


before


before


before
Professional, pre-recorded classes let you learn on your own time, but are dripped on a specific schedule so you're always on the same page as your fellow campers. That makes for great support on our private chat and accountability pods!


before
Professional, pre-recorded classes let you learn on your own time, but are dripped on a specific schedule so you're always on the same page as your fellow campers. That makes for great support on our private chat and accountability pods!


before

"Fraidy is my #1 Teacher! In just a month, my pictures went from looking nice to being WOW!
I now produce magical artwork and dreamy looking images. I immediately saw my clients recognizing the work and paying more for additional images to be edited.
Thank you Fraidy for your hard work, patience, and trustworthiness - I know that when you promise results, you deliver!
- Gitty Fligman
student work - Gitty Fligman
Enroll in The Editing Bootcamp Today


Some of our Awesome Student Work +
what people are saying about The Editing Bootcamp


*all photos in this gallery shot and edited by students of The Editing Bootcamp*
my promise to you
Not convinced you can actually see results in 10 weeks? I'll be totally honest with you - you can do it even faster.
By the end of the first 30 days, you'll have received access to the first 4 modules - that's all of Segment One. Meaning, by then you'll have already gotten comfy in Photoshop, done a head-swap, learned how to use curves, and how to do quick adjustments in Lightroom.
Here's my promise to you. If at the end of those first 30 days you haven't learned something new, simply reach out, show me you've done the work, and I'll refund your investment.
It's a big promise because I know I can deliver. Because I have a tried-and-true curriculum. Because I have awesome students to prove it. And because I believe anyone can create magic.
*See our full terms and conditions here.*
I believe in magic, and I believe in you. do you?
Enroll in The Editing Bootcamp Today

Got more questions? Want to talk before you register?
I'm offering free 10 minute phone calls so that you can get to know me, address all your questions and concerns, and make sure Image Editing Bootcamp is the right fit for you before you register.
Click here to schedule your call with me.
.jpg)

.png)


"After years of frustration, I've finally got it, thanks to your action!"
Thanks so much for the skin editing tutorial and action! This is something I tried a few times int he past but never created the action so I didn't really use it. I just tried to blur it a little but thanks for sharing your action it made me want to use frequency separation and it made me want to create more actions!
Devorah Grossman,
Photographer
.jpg)

Professional, pre-recorded classes let you learn on your own time, but are dripped on a specific schedule so you're always on the same page as your fellow campers. That makes for great support on our private chat and accountability pods! (TEB VIP)
Registration for our next TEB VIP + Group Coaching Class opens in the spring!
TEB Self-Study Program and TEB on USB available now

Access additional Peer Support via our students-only chat and private Accountabilty Pods
Incorporate and master your skills with weekly practice projects and live homework review hotseats.

Foster friendship and accountability with our Pod Partner Program

Learn on your Level:
Separate Segments mean you get all the deets you need if you're a beginner...
But don't need to go back to basics if you're more advanced
Every Question Answered!
Live Zoom Sessions:
Q&A
+
Homework Review Hotseats
(Always recorded so you can replay on your own time)
(TEB VIP. TEB Self-Study and TEB-on-USB include all recordings of past live Q&A sessions, plus a searchable questions spreadsheet.)

Lifetime Access
Learn at your own pace
Don't miss it!
Sign up to be the first to know when TEB VIP + Group Coaching opens for enrollment!

"You so easily taught me this method... that had always seemed so complicated when I tried learning it in the past"
Thank you so much for this free tutorial!
I love your editing style and your work in general.
Yesterday as soon as I had a chance, I tried it out on 2 of my photos, you explained it so well
(I tried learning this method but it seemed too complicated when others taught it to me... I'm a easy and fast learner but somehow I never caught onto it. I sometimes get annoyed when ppl explain things too much but your teaching skills are perfectly balanced)
I had to say thank you as soon as I could. I'm too excited about the results!
Thank you,
Draizy from Photogenic Pics

When you enroll during this special, limited time period, you'll get:
The Editing Bootcamp
10 Hands-On Modules teaching you exactly what you need to do to create magical images your clients will beg to pay for.
My personal, step-by-step workflow - including a checklist - that you can use for every single image to get gorgeous, consistent results
All the support you need to become an image editing wizard, including 12+ hours of live Q&A and live homework review hotseats (valued at $4,200!), access to our private, students-only chat, and Accountability Pods.
Exclusive textures and overlays created by me for added fun and magic
Learn the 4 things that must align for believable composites... And up your level of magic!
Push the limits on what's possible for your clients and create incredible work like the deer edit, or chipmunk edit.
Just think, you can bring every kid's dream into (virtual) reality!
Sign up for The Editing Bootcamp while on the live webinar, and receive this bonus module along with your course material!
BONUS 01
CREATING COMPOSITES


before
There's nothing quite worse than seeing your perfectly-colored edit completely ruined by bad printing. Ugch!
I sent dozens of sample images to print at different pro labs (same photos to each!) and compared the results before choosing the very best ones to work with.
Did you know that different labs do different products best?
The best lab for your wall art won't necessarily do the prettiest or most well crafted albums.
I've created a bonus pdf guide on where I like to print what, yours when you register for The Editing Bootcamp with the pay-in-full option!

BONUS 02
PRINT LAB RESOURCES GUIDE
We all want to edit well, but none of us want to fall into the time-sinkhole of image editing. Learn to speed things waaaay up, so you create record images in record time.
In this bonus training, I'll teach you how to record your favorite processes to create actions, as well as how to batch your edits. Think, go take a nap while Photoshop does the work for you. Ahhhh.
BONUS 03
Edit Faster! Learn to Create Your Own Actions and Batch Your Edits
Plus, these bonuses to get you even further:
...a word about the value...
Before the Editing Bootcamp, the only way to learn image editing from me was one-on-one in private mentoring sessions. Those sessions are currently selling at $2,000 for 8 hours of training.
That would make 30 hours of training worth $7,500.
But I wanted to make this affordable to you. And because we'll be learning as a group, I'm able to bring the price of this bootcamp down radically.
That's a fraction of the price for more than triple the hours!
Go grab it girl!
Register Now and Grab your Bonuses
Got more questions? Want to talk before you register?
I'm offering free 10 minute phone calls so that you can get to know me, address all your questions and concerns, and make sure Image Editing Bootcamp is the right fit for you before you register.
Click here to schedule your call with me.
BOOTCAMP FAQ's
What if I miss a live Q&A or Homework Review Hotseat? Is there any way to make up for it?
The Q&A sessions are live and interactive for an immersive, hands-on learning experience. All sessions will be recorded though, so you can always listen on your own time. And questions can always be submitted in advance, so I can answer them even if you're not on the live.
Do you have any teaser tutorials so that I can get a sense of your teaching style before I join this program?
Yes, I have a great tutorial + free photoshop action on editing skin to look naturally perfect. Go grab it right here.
Do you offer a guarantee? What's your refund policy?
I'm taking a bold step for this bootcamp and am promising results. If do all the work and your edits show no improvement within 30 days, just email me your homework and get your money back.
It's a big promise because I know I can deliver. Because I have a tried-and-true curriculum. Because I have awesome students to prove it. Because I believe in magic, and I believe in you.
Do you?
What programs / supplies do I need to have to participate?
Here's everything you need to have to make this course a success for you:
1) A computer with Photoshop and Lightroom
2) Zoom
3) Internet so you can access all the course content
And of course, bring all your positive energy and commit to success!
Got more questions? Want to talk before you register?
I'm offering free 10 minute phone calls so that you can get to know me, address all your questions and concerns, and make sure Image Editing Bootcamp is the right fit for you before you register.
Click here to schedule your call with me.
Still "thinking about it"?
You want to create better artwork.
It's a burning desire. Like, your heart hurts a little when you look at other people's beautiful work and you really want to be able to create the same.
See, I know what it's like to keep comparing your RAW files to other photographers' gorgeous edits... And coming up short.
I know how frustrating it is when you have this magical vision in your head that falls a little flat in camera, and you're sure you can spruce it up but don't know how.
I know how devastating it is to realize half-way through the session that you've mistakenly shot all those images on the wrong exposure, and have no idea how to fix it.
I know what it's like to open up Photoshop for the very first time and see only stars.
I know what it's like to have picked up some editing techniques 'here-there-and-everywhere', but still not know your style or get consistent images - like you have all the pieces of the puzzle but aren't sure how to put it all together...
I've been there.
But, imagine the feeling of creating something epic, leaning back and breathing deep and thinking, "I made that!"
Imagine what it's like to be 100% confident sending out huge 40x60 wall art, because you know it'll print well.
Imagine having a workflow so consistent, people recognize your style - and comment on your work - even without your watermark.
Imagine what it's like to have a vision in your mind - when your fingers know exactly how to bring it to life on-screen.
Imagine the kind of clients you attract when your artwork really is the cream-of-the crop.
Now imagine what kind of orders those clients place...
I've been there, too.

I know you want that as well. You want the confidence, the consistency, the creative satisfaction that learning editing can give you. That's why you're motivated more than ever to invest your time this season into mastering the skills that will become your magic wand, and creating the type of edits that can alter the course of your career forever.
You should give The Editing Bootcamp a 30 Day risk-free shot if you're motivated by any of the following:

I personally cannot wait to watch you discover your magic over these next 10 weeks!
Learning how to edit has literally shaped my career, and by extension, my life.
If you know my story, you know I actually learned to edit before I was a photographer... And that paved my entry into the world of high-end, luxury photography.
The lifestyle I have right now, the ability to set my own hours and be present for my kids, take hikes, or go paddle-boading on random weekdays, all while contributing to our household income... That all started with me learning how to edit back in my teens (who knew!).
Never mind the immense creative satisfaction it brings... I know for sure that if I had all the money in the world and didn't have to work another day, I would still be shooting, editing, and teaching others to do the same.
More than anything else, I want to share that with you.
If you're a photographer, you owe it to yourself to at least take the risk-free 30 day trial to see what your life as an editing wizard looks like.
Besides, Photoshop is so awesome! Whenever my kids watch me edit, they get so excited about what it can do. It’s a miracle! Mommy, make her hair pink. Mommy, give her two heads. Mommy, take away her nose…. Lol. the excitement is real!
It reminds me of myself when I learned to edit. I was completely enamored by the spot healing brush tool! I mean, ask any teen, what can be better than digitally zapping your zits?
I’m still excited about photoshop. The inspiration never ends. Give me an image, some curves layers, and I’m a kid in a candy shop. That’s one more reason I’m so excited to share the journey with you.
I mean, who doesn’t love sharing candy with friends? I know you’re gonna love it!
I look forward to meeting you personally inside The Editing Bootcamp, and am excited to help you discover your talent!
With so much love,
Fraidy
Let's get you registered!
Got more questions? Want to talk before you register?
I'm offering free 10 minute phone calls so that you can get to know me, address all your questions and concerns, and make sure Image Editing Bootcamp is the right fit for you before you register.
Click here to schedule your call with me.